Posts

Showing posts from December, 2017

#68 - Animation - Evaluation

Now that my animation is complete, I will evaluate how I think the overall process went and what the main issues were, as well as how to overcome these and improve my animation skills in the future. A lot of this I might have mentioned already but I would just like to summarise it all together. One of the most important aspects of the animation is the storyboard, which outlined all of the camera angles, timings and positions of the models which I planned to use throughout the animation. I can safely say that my animation followed this storyboard exactly. The camera angles are the same as the images in the storyboard suggest, and the models are in the right place. The action and motion is the same, and it all happens at the right time, lasting exactly thirty seconds. Except for the first couple of scenes, where the camera was taking too long to move into position, I did not have to adjust the timings at all for the rest of the animation. The only models which do not move in time are t

#67 - Animation - Rendering and Exporting

When the time came to export my animation, I had to render it 150 frames at a time, some with the EMP emitter in and some without, and then upload each file to YouTube. YouTube would compress it into an mp4 format, then I could download it again and import this new, much smaller file into Adobe Premiere Pro, which I used to piece together the final animation. Generally, this went well and did not take too long. I managed to compress and add each of the 900 frames successfully and put them into premiere pro. One frame was doubled up but it only lasts for one thirtieth of a second so it is not a big deal. I did have one quite huge problem when trying to batch render the frames. I had already successfully got the frames with the EMP emitter, then once I had deleted it and tried to batch render the start of the animation, it would just stop at frame 1. I had to move computer and sit and wait for ages before this would work again, wasting about an hour during which I could have added at lea

#66 - Animation - Music

The only sound I have in my animation is background music, which lasts the full thirty seconds. I do not have any sound effects because I ran out of time, simple as that. I should have been more prepared and paced myself better, then I would have been able to add some great sound effects, but unfortunately it is too late now. The good thing is that the music suits the scene well. It is quite dramatic, dangerous music, which support the narrative by saying in this scene some shady things are happening. I also managed to cut a thirty seconds excerpt out which fits perfectly. It doesn't start on a strange note and it doesn't finish on a strange note. It is in fact the 'Imperial March' from 'Star Wars: A New Hope' taken from YouTube. To include this music I downloaded it and imported it into Adobe Premiere Pro just when I had finished piecing together the animation sequence. I used the razor tool to cut out the thirty seconds I wanted and moved this new excerpt in l

#65 - Animation - Texturing 3

Image
I will describe how I textured my Jedi Star Fighter once I had placed it in the scene, at frame 660 (which is why this was done later than the others). But first I will mention that, due to me running out of time and not being able to figure out how to do it, I was unable to make the debris objects fly out of the hangar. This was mainly because I had parented them to the Invisible Hand and could not set individual key frames without breaking this constraint. I basically had a choice of having them in the hangar the whole time or not having them at all. To try and make up for this downfall, I textured the debris objects with a dark grey blinn, so that when they are in the shot they appear to be reflecting light from the sun behind them and shine, but they unfortunately do not move. The EMP blast would have taken the attention away from the objects anyway, and perhaps have made them invisible. Therefore, it is potentially good to have them stay still, but this could be fixed by revising

#64 - Animation - EMP Blast

Image
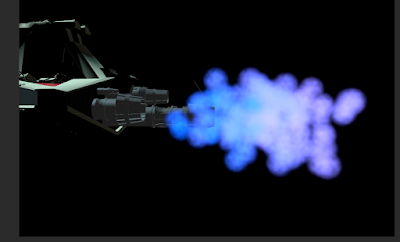
I attempted to create the EMP blast using a new particle effect. I set the emitter type to directional and changed the particle colour to blue, using the cloud setting. I intended to use the set key function to tell the particle emitter when to start and stop, but for some reason Maya was disregarding my key frames and ignoring my changes. I had frame 0 set to 0 particles per second and frame 270 set to 100, and it was building up to 100 with every frame, and would undo my set key to 0 on frame 269. To get around this, I will render the shot with the EMP separately so that it does not matter if the EMP is firing for the whole scene. I will then turn it off for the remaining shots. (I can't get a screenshot of this anymore because the emitter is deleted and the scene doesn't work anymore anyway - just picture a blue streak covering half of the screen). UPDATE: When I came to render the animation, I did in fact render the frames which I wanted the EMP to be present for first,

#63 - Animation - Rendering Problems

Unfortunately I have had many problems when trying to render my animation, and I will discuss how I overcame them here. I think it is important to understand why certain things in the animation are how they are. Once I had added my glow textures to the engines, I tried to render my 900 frames and the AVI file was too big for Maya to handle, and it would not export the file. I had to split my scene up into 200 frames at a time, just to get an exported file. The first time I tried this, the file was there but it was really laggy and took about 20 seconds to play a 7 second clip. To be able to get a rendered animation I will have to render groups of frames, about 200 at a time, or 100 for the last clip, then edit them back together once they have been compressed into mp4 files. Another large problem I have is that my Jedi Star Fighter model is corrupt at home. I think it works at University, not use why at all, but I will have to wait to add this model in. If it does not work at Univers

#62 - Animation - Lighting

Image
Once I had the movement done and I could see all for the individual frames rendered from the animation camera's panel (the one I will be rendering the final animation from), I realised that some parts of the animation were just not bright enough. The first area was the back of the Venator destroyer. You could see the glow of the engines just fine, but the actual model from the top was and underneath was almost invisible. To fix this, I added a directional light behind the Venator, pointing light directly at it, so when the animation renders you can actually see the colour of the ship now. I also added in a point light underneath the Invisible Hand where it is positioned during the Jedi Star Fighter sequence, because originally when it zoomed in on the star fighter you could barely see it. Now, with the point light, it is totally visible, as is the bottom of the Invisible Hand. Finally, I tried to make use of the bright blue sun I have in the distance by slightly changin

#61 - Animation - Background

Image
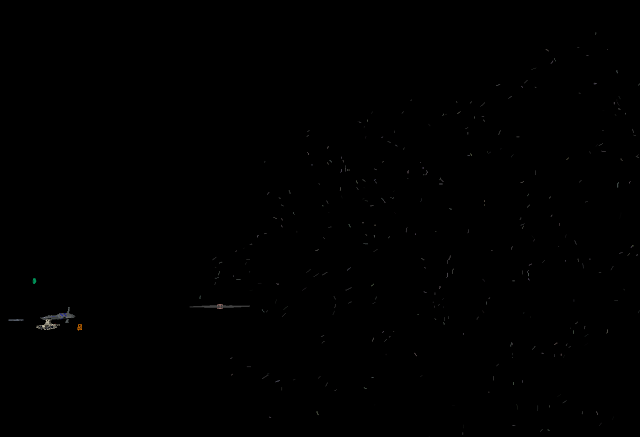
I have finally found a solution for my background issue. I have used the space dome and applied a texture. The first texture I tried would not appear on the model for some reason. The second texture however, which was sent to me by fellow student Josh Olsen, works perfectly. Reference to Josh for providing me with the image, which he found on Google and modified to suit the sphere shape. Now that the texture is on, it significantly improves the whole feel and atmosphere of the animation. By applying one texture the whole things feels much more complete and professional, although obviously it still has its issues. The texture resolution is good, and sufficient for this animation, but not perfect. The main thing is that now the animation looks like a proper animation with some effort put into it. I now need to add some more lights to make the models properly visible against the black background. I improved the texture even more later on by selecting the object, going to UV and choos

#60 - Animation - Scene 6 - 8 Motion

Image
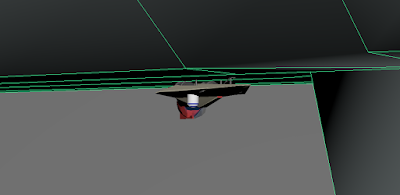
I will now describe how I animated the movement for the ships and camera through scenes 6, 7, and 8. A post for scenes 4 and 5 were not necessary because it is essentially just the camera moving towards the hangar and staying still; the two ships currently in the scene don't move after that. Scene 6 is where the camera has an extreme close up shot  of the Jedi Star Fighter, designed to avert the viewer's attention from all of the action and carnage of the EMP blast and focus on the main plot element. The camera rises up slowly for a couple of seconds while the star fighter performs its motion into the exposed hangar. The star fighter itself does not use a motion path. Firstly, to get it in the scene in the first place I made the scale 0 on every dimension until the frame when it is supposed to appear, and the viewer is none the wiser as it appears in time for the camera shot. When it does appear, it is quite small compared to the Invisible Hand, which is why an extreme clo

#59 - Animation - Engine Textures

Image
I had a lot of trouble with the particles when trying to make the engine flares, and frankly it looked terrible. I then realised that actually, why use particles at all when in Star Wars the engines just have a bright glow coming out of them, rather than a flame? So I deleted the particles and created a new texture with maximum glow on it, and the effect that resulted was perfect. I its so much easier to make, looks far better, and is easier on the render time. I added this texture to the engines on the Venator and the Invisible Hand and the glow looks very realistic. After the pain and effort that was a failed attempt to create an engine flare, I am very happy with how the engines now look. What is really nice about them is that there is a whole shot where you can see the whole back of the Venator, providing a great view of what might be the most realistic part of the entire animation. This significantly improves the whole effect that the specific camera angle was intended to cre

#58 - Animation - Camera Angles

Image
I would like to talk about the camera angles I have used throughout my animation, now that I have reached the thirty second limit (at least unless I edit the timings). I am confident that the animation follows the camera angles and timings written in the storyboard, which contains eight separate scenes. The beginning of the animation certainly matches the storyboard. It consists of a close-up shot  of the Invisible Hand, which moves beneath the camera like a shark. The close up shot is used to give a sense of scale, and show how big, and how dangerous the ship is. The viewer should realise that the Invisible Hand is the antagonist right away. The seconds scene follows on quite nicely with a long-shot  of the Venator Destroyer closing in on the Invisible Hand, preparing to fire the EMP. The distance from the camera reinforces the scale of the whole space being used for the scene. Obviously the ships are quite big, and it is a large scale attack over a wide area in space. The

#57 - Animation - Engine Particles

Image
Creating these particles was a long and painful process. I had to try many different techniques before I achieved something that worked in the renderer. In fact I can't remember them all, but I spent a long time finding tutorials that actually showed me how to use particles instead of fluids, then these tutorials would be rubbish anyway. It took forever to get the particles to be textured in some way. I first created an emitter and set it to have a volume emitter type with a cloud particle render type. I used the parent constraint tool to attach it to the Venator and luckily this time it worked. I added a dynamic colour attribute and set RGB values to 50, 20, 225 to create a bluish flame colour. The colour was fine, and it renders in Maya Software (but not Maya Hardware), but clearly the flame cloud is too big. To fix this, I set the emitter type to directional and reduced the lifespan and the radius of the particles. It is not a perfect flame shape, but it looks close enoug

#56 - Animation - Background

Image
Because I could not find a high enough resolution texture for my space dome, I decided to try and paint the background on to the whole scene. I used the paint effects panel in Maya to paint a preset galactic texture onto the sky box in the scene. I also set the background colour to black, so that only the stars would be the difference in the the texture, rather than having grey blobs and black blobs. This is a very difficult and time consuming method of setting a background, because you have to be very careful where you position your camera and mouse in the paint panel, as you could end up painting the area directly in front of you rather than behind an object for example. It is also a very render-heavy method; I've noticed straight away the the render time is much longer than before. If it takes too long I might have to remove it and find another way to texture the space dome, as originally planned. This would be a shame because the galactic paint looks really, really nice when us

#55 - Animation - Hangar Shields

Image
To create the hangar shield I added a cube prefab and scaled it to be the size of the hangar space. I then added a new Lambert to it, set the transparency to high, put on a blue tint and increased the glow. I had the same problem I had with the debris when I tried to constrain the hangar shield objects to the Invisible Hand. Like the debris objects, I have got the shields constrained from frame 195 on wards, and they do not move with the parent model before that. Conveniently, the hangar shields are also not visible until frame 420 as well, so for the purposes of the animation their current movement is fine. I also had a problem where it would move the hangar shields back for some reason and not cover the whole space, but I fixed this by scaling them up, setting a key frame and luckily they still did not poke out the back of the model. The hangar shields were quite easy to make, and they look very nice when rendered. There may be a need to improve the texture later on,

#54 - Animation - Debris Objects

Image
To create the oxygen venting effect in the hangar when the shield drops, I firstly created the objects which would be flying out of the hangar. I simply created two cube prefabs and two cylinder prefabs and scaled them into different sizes. The cubes looked like boxes of supplies, and the cylinders looked like the medic droids you get on the CIS ships. I also added a round cap on one of the cylinders and set it to have 9 caps to make it look like an R2-D2 type droid. No detail will really be required on these because I will add a highly reflective blinn so that the glint as they fly past the camera at a high speed. Once I had positioned the objects inside the hangar, I set out to constrain them so they moved with the Invisible Hand. At first, this worked, however I attempted to make them virtually invisible until frame 480, where I would suddenly scale them up from tiny in frame 479, so they were not visible in the first part of the animation. I then realised that this was totally

#53 - Animation - Texturing 2

Image
Using the displayed image, I proceeded to texture my Invisible Hand model. Again, due to a lack of time and available resources from the internet, I resorted to using block colours. Despite this, I feel that he textured model looks quite nice, and is certainly a significant improvement from what it was before. The main thing, which I claimed earlier in the blog, is that the texture would fix the bit along the middle which is flat and less detailed, and the black texture I have applied does the job. It casts it into shadow as well as an actual shadow would. https://www.pinterest.co.uk/pin/513199320018279204/ Firstly, I selected the whole object and applied a dark grey Lambert. I then selected some of the faces around the side and set them to be a dark blue Lambert, sometimes with another white Lambert in between, to give the ship its actual colour scheme. I noticed that on the actual image it looks more flecked, as in some areas are a lighter grey than others. Therefore, I select

#52 - Animation - Scenes 1 & 2 motion

Image
Due to some awful camera angles and speed issues, I had to drastically change the positioning of the camera and the Venator model. Oddly enough, removing some of the key frames made the whole animation much smoother. Firstly, the camera was taking far too long to get the Venator into view, so instead of having it swing around for a second, I had it move straight from one position to another on the next frame. This gave the Invisible Hand just enough time to get out of the shot before the Venator comes in. Next, I removed all of the key frames between the first and last position of the camera, so instead of bouncing along madly, it just smoothly pans around and finishes ready for the third scene nicely. Finally, I did a similar thing for the Venator where I was left with only two key-frames, moving from A to B at a consistent speed, and ending in the perfect position for the EMP to fire in the third scene. At present, the motion in the first 10 seconds of the animation is exactly how

#51 - Animation - Texturing 1

Image
In this post I will explain how I went about texturing the Venator Star Destroyer Model. First, a bit of honesty. I could not find any suitable textures on the internet which could provide my model with the correct bumps and lines, and I simply do not have enough time at this point to look for textures for my models when there may not be any accessible to me. I certainly can't create them myself. So I have had to use simple Lamberts and Blinns for my Venator. The textures do significantly improve the appearance of the model even with just block colours. However, the Venator is always so far away from the camera that I doubt the details on the textures would be especially noticeable anyway. For now, the colours are enough. https://hellspawnreaper.deviantart.com/art/Venator-class-Star-Destroyer-207610911 Firstly, I selected the entire model and applied a new Lambert. I changed this to a sort of yellow/beige colour, as they are in the prequel films. I then selected the raised

#50 - Animation - Scene 3 Motion

Image
Before beginning setting up the camera path and model positions for the third scene, where the EMP blast is seen travelling across the screen, I fixed the timing problems which were present and doubling the length of time my animation should have been. I believe this problem was originally caused by not paying much attention to which key-frame new positions were being added to, or not acknowledging the time difference between then, and there were a few seconds where not a lot was happening. To cut this extra time out I simply copied the later key frames for each model into an earlier frame, and in doing so shaved about 5 seconds off the run time, from about 14 seconds down to 9. This is how long it should have been according to the storyboard. I also removed some unnecessary key frames all together, if they were simply delaying the movement time of an object or pushing them off the desired path. Unfortunately, removing some key frames did also make the scene appear rushed, and it was v

#49 - Animation - Scene 2 Motion

Image
Now I will explain how I created the ship's motion for scene two of my animation. This scene lasts about 3 seconds, and it will show the Venator coming into view from a distance, hopefully creating a sinister atmosphere, before the camera backs up to fit both the Venator and the Invisible Hand in the shot ready for the third scene. I began by ensuring that the Invisible Hand had enough time to move out of the camera's view before rotating the camera back up and towards the right, where the newly imported Venator model was positioned. I moved the Venator back a bit and set it to be moving even while it isn't in the shot, as I think this could make it feel more realistic, rather than having the model suddenly start when the camera has finished rotating. Once the camera has rotated, the Venator moves across the screen towards the left, in a long shot , before the camera turns back to the left and moves back. Like with the Invisible Hand, I have not used a motion path because

#48 - Animation - Scene 1 Motion

Image
In this post I will describe how I set the models to move for the first scene, based on the storyboard. This first scene lasts approximately six seconds, and is quite simple to animate because it involves a camera staying in one place while a ship move in a straight line beneath it. This may sound too simple, however the purpose of this scene is to give the viewer a sense of scale. It achieves this by showing the full length of the Invisible Hand model, before the camera turns to show the Venator off in the distance. The process of animating this was very easy. I placed a camera, facing down, in the space dome, looking at the path the Invisible Hand follows. I tried to use the bezier curve tool  to create a motion path  for the Invisible Hand, however I decided that for now, as the ship is only moving in a straight line, it would be just as easy to animate it without a motion path and move it forwards with each frame. This could be a problem later on if I need to attach it to a motio

#47 - Animation - Scene Set up

Image
To set up the scene ready for my animation I first changed the settings to suit my purposes. I accessed the settings/preferences window and changed the time to NTSC 30fps. I then adjusted the time slider settings so that the start frame was 0 and the end frame was 900, which is exactly 30 seconds. I set the playback speed to real time so that I can actually see what my animation will look like when I play it in the editor. Next, I created a 'space dome' inside which the entire animation will take place. I added a sphere primitive and scaled it to be 512 units wide on each axis, then reversed the faces and added it to a template layer. I also smoothed  it three times, as this will improve the quality of the texture when it is added without putting too much strain on the render time. This left me with a large open space for my models to move around in, surrounded by a space texture. Finally, I created the sun which will be the main source of light in the scene. The lig

#46 - Animation - Animation Techniques 6

This exercise was much more successful than some of the previous ones. I had no difficulty in using the various constraint tools to make objects interact with each other. The first constraint tool I tried was the point constrain tool, which makes an object follow a master object. I simply selected the objects in the right order, used the tool, then set some key frames before rendering just to show the motion of the objects. This could be useful for keeping objects orbiting around a sun object, or around a bigger ship. It might be used to keep the Invisible Hand and the Venator at the same distance from each other throughout the animation. Of course there are also many possibilities for the camera to use this tool. This was quite a simple thing to do, so there isn't much else to say. Another constraint tool I tried was the aim constrain tool . Again, this was very simple to use. I just selected my two objects and applied the aim to them. I had to set the aim vector to use the

#45 - Animation - Animation Techniques 5

Image
For this exercise I tried to make a hand mesh move from a flat position into a thumbs up position using skinning and rigging. I began by using the create joints tool  to add in the bone structure to the hand. I simply clicked and dragged into the shape of a hand's skeleton. I had to drag some of the joints down into place, but this was not a problem. It did however cause a small but important problem later on. Then, I used the interactive bind tool  to connect the joints to the mesh (or skin). I didn't really spend as much time as I perhaps should have adjusting the heat maps, partly because I wasn't entirely sure what the best positions were. This caused the fingers to bend in unnatural ways later on in some places. This is the issue also mentioned earlier caused by dragging the joints into place, but not quite into the best place. I had no problem moving and rotating the joints, and for the most part the hand looked normal when it was in the thumbs up position. Howe