I have begun modelling the final Star Wars ship on my list, the Invisible Hand. Before I even explain how I created it, I'd like to note that I found this part of the model incredibly difficult to make because of its long, round shape, and balancing the polygons was near enough impossible for someone of my skill level, so it will not be perfect at any stage. However I have got it into a state which looks like what it is supposed to, and it is recognisable as the Invisible Hand. Here are the schematics I used:
 |
| https://www.deviantart.com/tag/starwarsclonewars |
 |
| https://www.deviantart.com/tag/starwarsclonewars |
 |
| https://www.deviantart.com/tag/starwarsclonewars |
I imported the schematics into the view port, which I had to cut from the same image online, and managed to get them all on the same scale, unlike the other two models. This is helpful because I should be able to balance the shape from all perspectives without having to guess. I started with a cylinder and essentially performed the same process as I did on the F16. I made it very thin, then used the
insert edge loop tool to add in edges and vertices all along the cylinder. Using the schematics I dragged the top, bottom, far left and far right vertices on each side of the cylinder to the point on the schematic where the shape stopped. Then, for each face between the extended points on the cylinder, I pulled them out and into the shape seen from the front view schematic. I had symmetry turned on the entire time when creating this half of the ship, so I can guarantee everything is symmetrical. Once I had fattened the whole body out, I focused on the front of the ship and adjusted the vertices so that it created the pointed, flat shape of the hull, then
extruded the front faces to create the point on the front end of the ship.
Now, the shape of the ship is reasonably accurate, bearing in mind that it is a difficult shape to make. It also already uses a lot of polygons just to make it sufficiently round, and I have had to reserve the
smooth tool for certain areas which need rounding the most to ensure I don't go over the limit. The main area is on the bottom where there is a bump underneath the hull, using the
smooth tool here seemed to match the shape perfectly to the schematic and make it much rounder. There are a couple of early problems I would like to address. Firstly, to
smooth the ship anymore would add a huge amount of polygons, as the whole thing is a cylinder. However, it looks enough like the right shape that I should be able to get away with not smoothing it too much more. If there is time at the end, I will smooth some more whilst staying under the maximum polygon limit. Secondly, the main body is very bland, with no details on it at all, just the shape. The actual ship is actually totally smooth in these places, so there are no details to add, which is why I must get the shape as accurate as possible. When I come to texture the model it should look much more detailed and creative, but for now there are very few additions to create. I am also aware of the fact that the area in the middle of the top and bottom halves of the ship looks off. This is because it should be a square indent, not a diagonal indent, but I cannot find a safe way to add in a whole extra face without destroying the rest of the model, so I am leaving it for now. The entire area will be textured black anyway so this mistake will be very easy to hide in the animation. If done right it will go completely unnoticed. The size of the gap around the edge is the right depth at least, so everything inside can be a shadow.
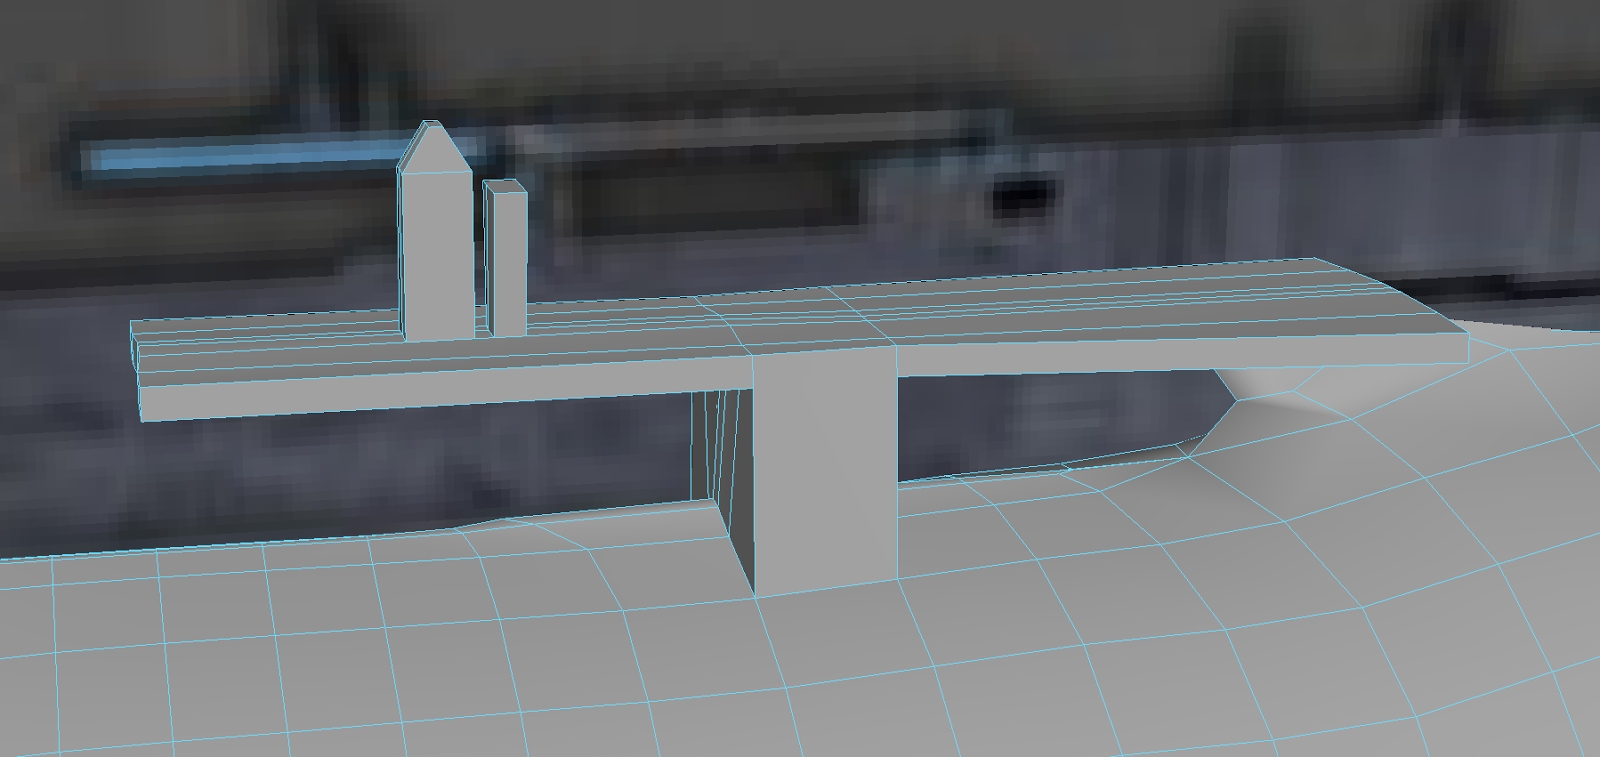
As for the few details that are on this half of the ship, I simply used the
extrude tool to pull out the shapes from the faces in the cylinder, then moved the edges around to make them straight, and finally used the
multi-cut tool to make a thinner edge on the top of the new tower before dragging that out either way to create the long platform atop the ship. As for the other towers, I cannot find any images where they are zoomed in enough to present details, so for now I have made them all tower shapes at different heights and will texture them to look like dark skyscrapers as they appear to be on the actual ship schematic.

So far, probably my weakest model, but also the most difficult one to create, yet has the fewest outer details. Hopefully the other half of the ship will present me with more opportunities to add details to the model, and will also hopefully be easier to create. Once the shape of the body is done I should have no trouble with the spires and the hangar, and any other details I decide are worth including instead of texturing. The good news is that an entire half of the model (in terms of its dimensions) is complete, and due to the high number of polygons and lack of details around it, it is in an ideal state to be modified quickly and easily if necessary. I imagine I will be adjusting the shape slightly all the time if I see tiny little details.


Comments
Post a Comment