#31 - Assignment Models - Venator Star Destroyer 5
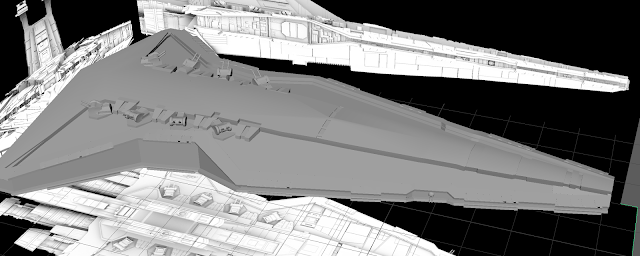
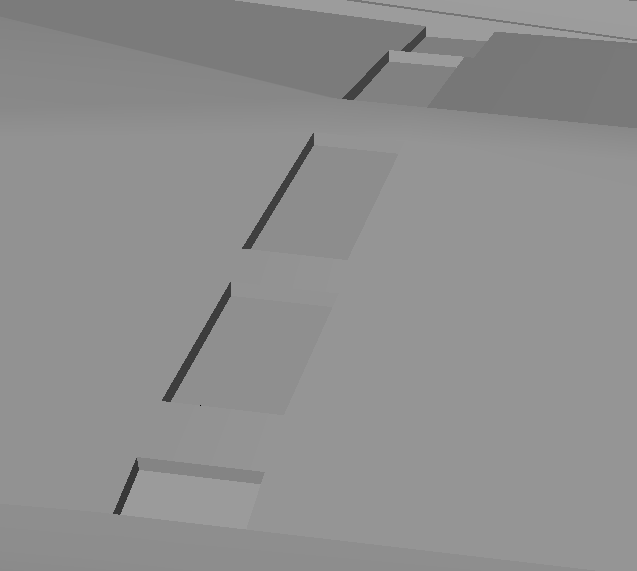
Now for the last of the three sub sections on the front of the model, the central bridge. There was really not a lot to do on this bit, as most of the details will be textured. Like with the previous sections, the details are so flat that there would be no point in even implementing them, as without texture they would be invisible against the grey mesh anyway. All I had to do for this was add some new edges along the bridge using the connect tool, then extrude the faces made between these new edges down. I did have to take care when moving vertices across (for the new edges) because the front of the ship has a downwards incline, so I had to drag both across and down or up to keep the ship straight. Otherwise, it was this simple process in five areas running up the ship. For the last area, I had to add divisions as there were chunks in between that were not lowered in the schematic, but I extruded all the faces between these chunks.

Once that last section was extruded I was done with the main body of the ship. The rim had all the bumpers placed, the middle bit had the turrets done and the central bridge has its extrusions. I am happy with how each of these elements turned out. For the bumpers, I do not think the shape could be any more accurate, although there might be slight differences in the positioning. As for the turrets, the shape of the back had to be sacrificed but ultimately this is probably the best way of doing it for my purpose. The shape will never be visible in the animation so to use so many polygons on a bezier curve would be a waste of processing power. Otherwise, their positioning is perfect according to the schematic and they do not overlap or block anything they shouldn't. All of the subtler details, and the flat patterns on the ship will be implemented using textures, as this ship will be seen only from a distance. Even close up, textures would probably look better than very, very faint extrusions.
One thing I do not like about the connect tool is that you can't connect the centre of an edge to a vertex (at least not that I'm aware), so I've been having to connect to the middle of a longer edge, making the new edge at an angle. I then have to drag the new vertex on one side to where it should be before target welding the opposite vertex. This comes with a risk because moving the vertex along was causing the shape of the main body to have a large bump, so I had to make sure I moved it back down the exact right amount. If I find myself modelling a similar thing in the future I will attempt to find a way to connect a vertex with an edge. Now I must create the engines at the back, the spire on the top, and the lesser additions underneath, then the model will be done.
Once that last section was extruded I was done with the main body of the ship. The rim had all the bumpers placed, the middle bit had the turrets done and the central bridge has its extrusions. I am happy with how each of these elements turned out. For the bumpers, I do not think the shape could be any more accurate, although there might be slight differences in the positioning. As for the turrets, the shape of the back had to be sacrificed but ultimately this is probably the best way of doing it for my purpose. The shape will never be visible in the animation so to use so many polygons on a bezier curve would be a waste of processing power. Otherwise, their positioning is perfect according to the schematic and they do not overlap or block anything they shouldn't. All of the subtler details, and the flat patterns on the ship will be implemented using textures, as this ship will be seen only from a distance. Even close up, textures would probably look better than very, very faint extrusions.

One thing I do not like about the connect tool is that you can't connect the centre of an edge to a vertex (at least not that I'm aware), so I've been having to connect to the middle of a longer edge, making the new edge at an angle. I then have to drag the new vertex on one side to where it should be before target welding the opposite vertex. This comes with a risk because moving the vertex along was causing the shape of the main body to have a large bump, so I had to make sure I moved it back down the exact right amount. If I find myself modelling a similar thing in the future I will attempt to find a way to connect a vertex with an edge. Now I must create the engines at the back, the spire on the top, and the lesser additions underneath, then the model will be done.


Comments
Post a Comment