#37 - Assignment Models - Invisible Hand 3
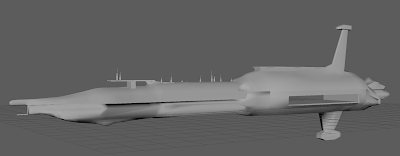
Now that the front and the back halves of the ship were created and connected, I was able to cut out the hole in the back for the hangar, which is a crucial part of my storyboard, where the Jedi star fighter flies in. Luckily, as I had a lot of difficulty with the front of the ship, I was able to get the back of the ship just right so that in the animation the hangar should look very good. I did originally plan to make a large shape to use to cut out the hangar, using boolean difference, but fortunately the faces I already had were in the perfect position to be simply deleted. I then used the bridge tool to close all the new gaps that could be seen inside the ship, creating a floor, walls and a roof inside. As the bump around the hangar had already been created, this was essentially all I had to do to create the hangar, and the resulting size matches the schematic.
There were not any engines on the schematic, so I created them using my own imagination (and comparing to some Google images afterwards). Like with the Venator engines, I used a cylinder, extruded the edges to make a cone shape, and the extruded every other face around the cone to give it some depth. These engines are less detailed than the Venator ones, but use the same pattern, and look like the ones in the images I compared them to. There are only two of them, one on each side, and they are not especially long, so I am happy with how they look. The actually make the rest of the ship look much better just by being there.
This is more or less it for the Invisible Hand model. It has taken much less time than the other two models, and has far fewer details on it, but that is out of my hands, as the actual ship is smooth and should look much, much better when textured. As far as the geometric shape goes, I feel it has turned out very nicely, especially given how difficult it was to get the round shape right. The symmetry setting was by far the most useful tool for this entire model, because to get the round shape all the way from front to back I was only moving vertices and faces, not really using many mesh tools at all. I will justify the decisions I have made relating to the final state of the model in one last evaluative blog post.
There were not any engines on the schematic, so I created them using my own imagination (and comparing to some Google images afterwards). Like with the Venator engines, I used a cylinder, extruded the edges to make a cone shape, and the extruded every other face around the cone to give it some depth. These engines are less detailed than the Venator ones, but use the same pattern, and look like the ones in the images I compared them to. There are only two of them, one on each side, and they are not especially long, so I am happy with how they look. The actually make the rest of the ship look much better just by being there.


Comments
Post a Comment